MPPT vs PWM charge controller: which one your solar setup needs
The traffic cop between panel and battery, chosen in one paragraph and sized so it never becomes a fire question.
In this article
Choose PWM for a small system under about 200 watts where the panel's nominal voltage matches the battery, such as a 12 V panel on a 12 V battery. Choose MPPT for larger arrays or higher-voltage residential panels, where it harvests roughly 20 to 30% more energy and pays for itself. Either way, size the controller so its amp rating sits at least 25% above what the panels can push.
That is the one-paragraph decision Project 20 of The Off-Grid Handbook promises, and it lines up with University of Arizona Extension guidance on stand-alone solar systems. The details below cover sizing, wiring order and the mistakes that cook controllers.
What does a charge controller do?
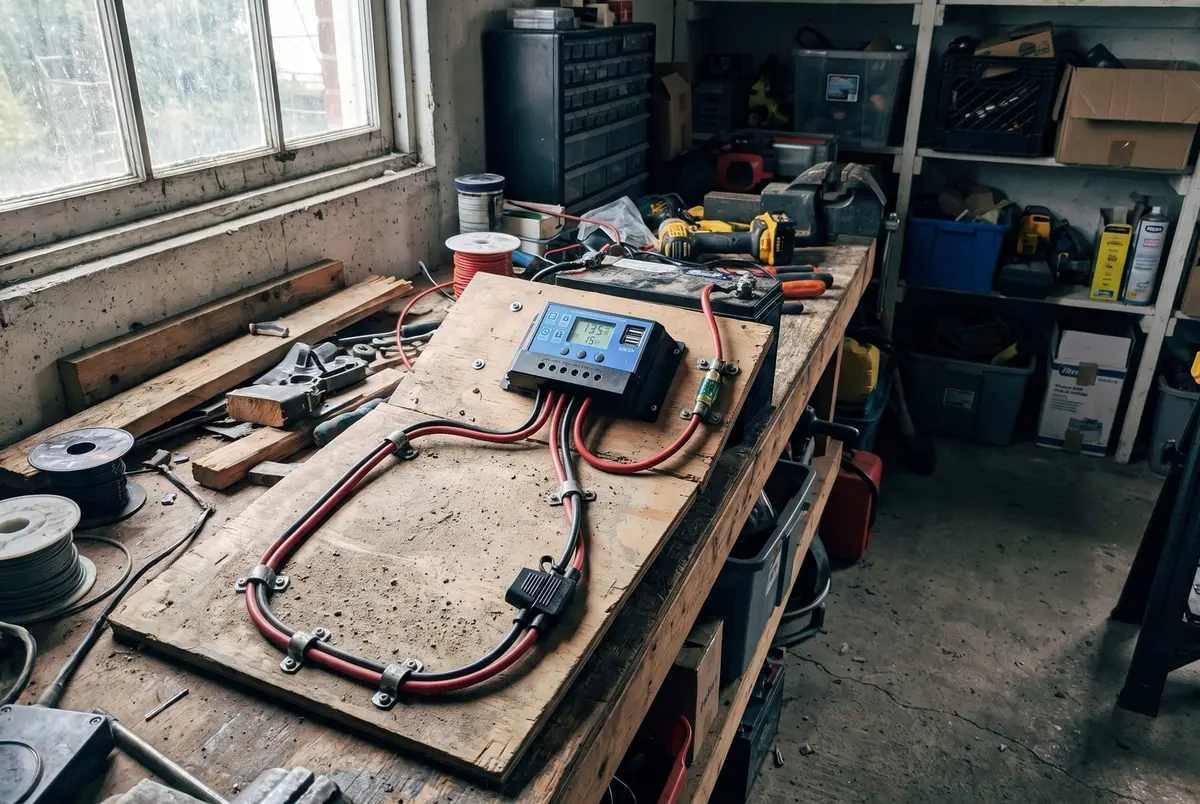
A battery cannot regulate the current flowing into it from a solar panel. The charge controller sits between the two, lets current in when the battery is low, and prevents overcharging and undercharging, per the University of Arizona Extension.
Many controllers also have load terminals that disconnect DC loads before they drain the battery too far. The book calls the controller the traffic cop of the system.
MPPT vs PWM charge controller: the real difference
A PWM (pulse width modulation) controller connects the panel to the battery and regulates the current in pulses as the battery fills. It is the economical choice, but the panel's nominal voltage must match the battery's: a 12 V battery bank needs 12 V panels.
An MPPT (maximum power point tracking) controller lets a higher-voltage array charge a lower-voltage battery without wasting the extra voltage. That opens the door to residential-class panels or panels wired in series, and since higher voltage means lower current, the wire from the array can be thinner.
| PWM | MPPT | |
|---|---|---|
| Best for | Under about 200 W, 12 V panel on a 12 V battery | Over about 200 W, or high-voltage panels |
| Panel voltage | Must match the battery's nominal voltage | Can run well above battery voltage |
| Energy harvest | Baseline | About 20 to 30% more, per the book |
| Wire from the array | Heavier, at low voltage | Thinner, at higher voltage |
| Price | Lower | Higher |
| Sizing rule | Panel Isc × parallel strings × 1.25 | Array watts ÷ battery volts × 1.25 |
Charge controller sizing
The book's formula is panel watts ÷ battery volts × 1.25 = minimum amp rating. The University of Arizona Extension uses the same math for MPPT units: four 100 W panels on a 12 V battery work out to 41.67 amps, so a 50 A controller is the pick.
For PWM controllers, the extension sizes from the panel's short-circuit current (Isc, printed on the label), multiplied by the number of parallel strings and by 1.25, the National Electrical Code safety factor. In its example, a module with 5 A of Isc needs 6.25 A, so a 10 A controller.
The Florida Solar Energy Center at the University of Central Florida adds a warning: reflection from clouds, water or snow can push panel current to about 1.4 times its rating. That is the logic behind the book's field note, when between sizes, go up, because an oversized controller is a growth plan and an undersized one is a fire question.
Charge controller for a 100W solar panel
A single 100-watt, 12 V-nominal panel is classic PWM territory. Read the Isc on the panel's label, multiply by 1.25, and pick the next controller size above the result; the book's solar charging station uses a 10 A controller at this scale.
If you choose MPPT for the same panel, the watts formula gives 100 ÷ 12 × 1.25, about 10.4 A, so step up to the next size above 10 A. A bigger controller also leaves room for a second panel, and the book observes that a station starting at 100 W rarely stays at 100 W.
Placement matters as much as the controller. A panel on a ground mount tilted to your latitude, clear of shade, keeps either type of controller fed.
How to wire a charge controller
- Battery first. Connect the battery to the controller before the panel. The book warns that the reverse order can damage the controller.
- Then the panel. Connect the panel leads to the controller's solar input.
- Set the battery chemistry profile (LiFePO4, AGM and so on) to match your battery.
- Fuse both sides, the panel input and the battery lead, with wire and fuse sizes from the controller manual.
- Verify the charge stages. Across a sunny day, the display should show bulk, absorption and float.
The battery side carries real current even at 12 V. Fuse it close to the battery's positive terminal, and see our LiFePO4 battery box guide for a fused layout that keeps every circuit separate.
Heat, cold and panel voltage
Panel voltage drops as the cells heat up. The Arizona extension cites typical temperature coefficients of about 0.3 to 0.5% lost per degree Celsius, and notes that a panel measured at 140°F on a Tucson afternoon is running 35°C above its rated test temperature.
On a hot day, a PWM system has less spare voltage to work with, while an MPPT controller can draw on a higher-voltage array. The same effect runs the other way in cold weather, when panel voltage rises, so leave headroom under an MPPT controller's maximum input voltage and take the exact limit from its manual.
Once the controller is chosen, the next question is how much battery it should be filling. Our guide to sizing backup power from a watt-hour audit gives you that number.
Frequently asked questions
Is MPPT worth it over PWM?
For systems above roughly 200 watts, or with high-voltage residential panels, yes. MPPT harvests about 20 to 30% more energy and allows thinner wire from the array. For a single 100 W, 12 V panel charging a 12 V battery, a PWM controller does the job at a lower price.
What size charge controller do I need?
Divide total panel watts by battery voltage and multiply by 1.25. Four 100 W panels on a 12 V battery need at least 41.67 amps, so choose a 50 A controller. For PWM, you can also size from the panels' short-circuit current times 1.25. When you land between sizes, go up.
What size charge controller for a 100W solar panel?
On a 12 V battery, a 10 A PWM controller is the usual choice, as long as the panel's short-circuit current times 1.25 stays under 10 amps; check the label. With MPPT, 100 divided by 12 times 1.25 gives about 10.4 A, so pick the next size up. A larger controller also leaves room for a second panel.
Do you connect the battery or the solar panel to the charge controller first?
Battery first, then the panel. The Off-Grid Handbook warns that connecting in the reverse order can damage the controller. Once both are connected, set the battery chemistry profile to match your battery, fuse both sides per the manual, and confirm the display shows bulk, absorption and float across a sunny day.
Sources
- The Off-Grid Handbook, Garrett Dalton, Project 20
- University of Arizona Cooperative Extension: Stand Alone Photovoltaic (PV) Systems (AZ1983)
- Florida Solar Energy Center (UCF): Batteries and Charge Control in Stand-Alone Photovoltaic Systems
Safety guidance changes. Check the agency pages above for the current version, and follow your local code and manufacturer instructions.